Beautiful Hand Scraped Floor near Danville Arkansas

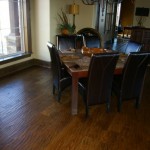
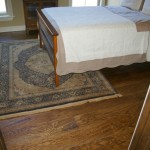
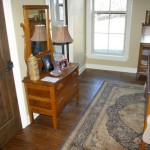
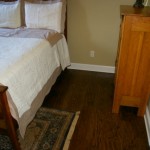
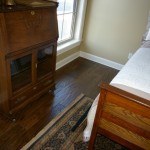
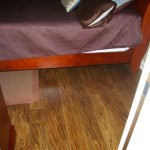
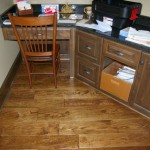
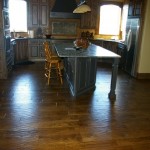
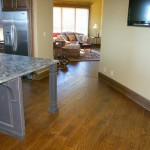
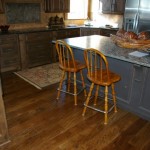
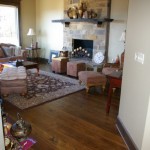
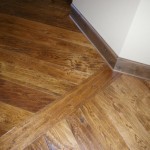
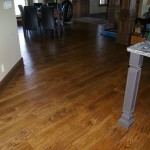
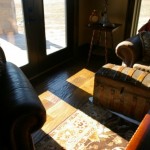
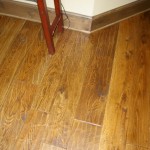
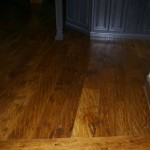
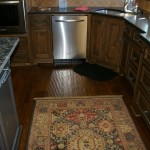
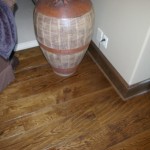
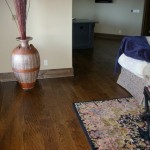
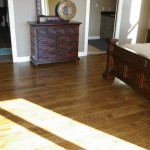
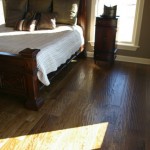
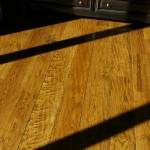
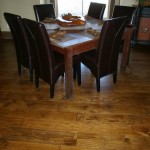
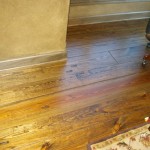
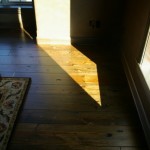
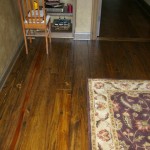
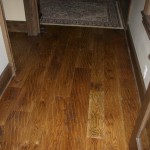
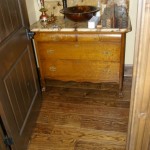
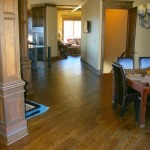
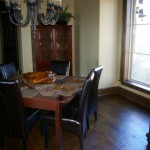
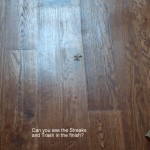
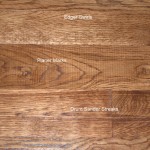
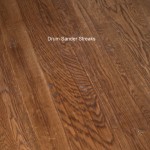
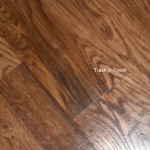
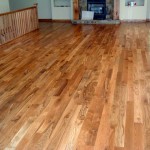
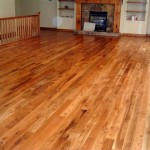
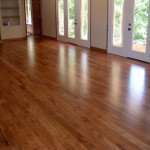
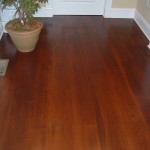
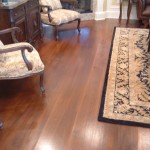
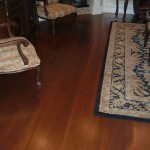
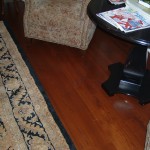
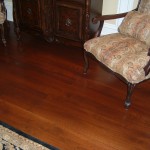
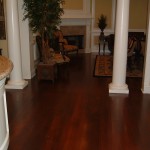
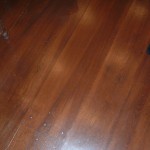
We Recently installed and finished a Wide Plank Hand Scraped White Oak floor in a beautiful home near Danville, AR.   The floor was rustic white oak, mixed width 6,7 and 8 inch wide planks.   The floor was finished with a Minwax Jacobean color and oil based finish.  You can see by the pictures, the floor turned out very nice.


A lesson on how “NOT” to Sand and Finish a Wood Floor

We recently bid on a 1200 square foot flooring  project and were not chosen by the owner originally.   This does happen occasionally, but not too often as even though we aren’t the least expensive flooring installation and finishing company around, normally when everything is considered, quality, price, reputation, dust free sanding, etc.   Most clients who compare will find out the same thing that I believe, that we are the best value for every dollar spent on the floor.   This portfolio of  pictures will show you why.

We did not originally get to do this job, but after the first flooring contractor made a horrible mess of this wood floor, we were called by the owner to fix the problems.   This is not the first time this has happened, and because it happens more than I would like, I decided to show these pictures and tell this story.

I’ve been in this business for a long time, and I’ve seen a lot of very poor jobs over the years, some done by homeowners themselves when trying to save a few dollars by doing their own floor.  And most would say they would never repeat that process.   But in all these years, I don’t believe I’ve ever seen a floor in this bad of shape.   I really don’t see how someone could mess up a floor this bad, unless they were trying, and even then it would be difficult.  Especially someone who actually claims to be in the hardwood flooring business.

I would never name the flooring company who did this floor, because with work like this, I am sure they will be weeded out of the business very soon, and rightfully so.   This floor has about everything wrong with the sanding and finishing job that you could have wrong with one.  I’ll outline many of the problems that you will see when looking at the photos, and I’ve made notes on the photos so you can see tell what I’m showing you.

  1. Drum Sander Streaks – These can be caused by several different things, but are normally caused by either a bad sanding belt if a belt machine was used, or by a really bad place on the drum or a screw or nail in the drum if a drum machine was used.  There were literally hundreds of these streak marks in this floor, they were everywhere you looked.
  2. Planer Marks –  These are the original planer marks from the factory that were left on the floor.  These are places that a sander never touched the floor.  They show up as lines running across the boards, rather than longways.
  3. Edger Swirls – This is caused by the edger machine, the machine that is supposed to be used around the perimeter of the floor only to sand areas that cannot be sanded by the larger belt or drum machine.  These are normally sanded out by using a finish sander or hand sanding (we actually use a halogen light to look for these)  They are caused by using too rough a sandpaper on the edges also.   Funny thing about these, they were everywhere.  This original contractor used the edger in places they had no business using it.
  4. Puddles in the Finish –  There were puddles in the finish everywhere in this floor.  It looked to me that the finish was basically “slopped” on the floor with a mop.  Some place the puddles were nearly 1/8 inch thick!!!!  You would almost have to just pour the finish on the floor and leave it to get this.  I know, I couldn’t believe it either.
  5. Trash in the Finish –  When you site finish a floor, there is no way to get every single piece of trash out of the finish.  1 or 2 tiny pieces of trash in 1000 square feet is acceptable, and these can be easily picked out with a fingernail and repaired, but this floor had literally THOUSANDS of chunks of trash.   Almost looked like the trash had been thrown in the finish on purpose, but it wasn’t.   There was no vacuum system…..I don’t even believe the floor was swept before the stain and finish was applied.   It was really sad.

This portfolio has about 20 pictures of the “before” photos of this job.   We are currently working on this project and of course had to completely re-sand/refinish this floor down to bare wood.  As soon as the floor is finished, I will also post some “after” pictures.   The homeowners were getting very excited about moving into their brand new home, and now because of this original very poor floor sanding and finishing job, they will have to delay that for a couple weeks.

The moral of this story, please check out the contractor that does your work on your home.   It is real easy to check us out as we’ve got hundreds of happy customers, and you can see the quality of the work we do right on this website.  This “flooring contractor”  (and I use that term very loosely)  Did not have a website, and was basically just chosen on price.   Price is not the most important criteria for choosing a flooring contractor, as I believe you would have to agree by looking at these pictures.

Lee Walsh

I have left these pictures large on purpose so you can see the detail.  It may take some time for them to load with a slower connection.

Click on a picture below for a slide show of all the pictures.


#2 White Oak – Natural Oil Finish

Pictures of a #2 Common White Oak Floor with a Natural Finish

Click on a picture below for a slide show.

Wide Plank Rustic White Oak with Stain

This project was in a Doctors Office in Harrison, AR.   This floor came from the northeastern U.S. and was a special order, “long length” flooring product.  It is a rustic white oak, with boards that were up to 12 feet long.   It is stained with a special “Burnt Umber” color.   This is a very nice high end product and the results speak for themselves.  This floor also has square nails installed.


Rustic White Oak Floor with Stain

Click on a photo below for a slide show


Hand Scraped

Hand Scraped Walnut


In 2006 we started doing Hand-Scraped wood floors. Now these distressed floors are some of the most popular floors that we do. Since these floors are scraped and textured by hand, no two floors are alike and they are all very beautiful. These are all hand scraped and textured in our shop before they are installed. They are all done by hand, one board at a time.

Some installers scrape a floor after it is installed. Scraping after installation means that you scrape across the joints of the boards, making each board blend together and basically look like a big sheet of uneven plywood when you’re done which is not a desirable look. We work with each board individually, and get the definition of each board in the floor that you are looking for. The floor has to be immediately finished after installation to protect the floor.

Our hand scraped floors start at about $ 7.00 per Square foot, installed and finished, for Rustic Pine up to about $12.00 per square foot for Walnut or Cherry.


We can also provide flooring with other textures such as wire-brushed, circle sawn, skip sawn, etc. If you are looking for something a little different than the plain smooth floor, give us a call or send an e-mail today.   Be sure and check out all the pictures of hand-scraped floors all over our site.

Hand Scraped Walnut Floor

Hand Scraped Walnut Floor

Hand Scraped White Oak